Thursday, November 25, 2010
Monday, November 15, 2010
baby sitting
this little baby girl is Daytona
...or Tony or Tona
...or Tony-Macaroni
...or Stick o' Butter
she has many, many nicknames

she is a miniature daschund puppy - very tiny
we had the pleasure of baby sitting her
while my parents were away for a week

she was a joy to have in our home - sooo adorable & sweet
I miss this little face
Thursday, November 11, 2010
stumbled upon
I love it when you stumble upon an artist's work and it takes your breath away...
today I stumbled upon Swan Bones Theater
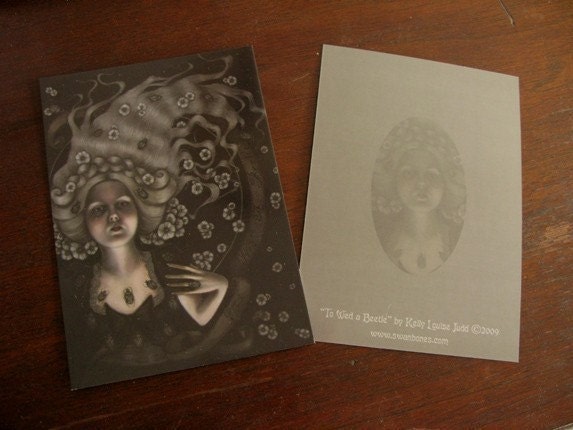
today I stumbled upon Swan Bones Theater
I am in love with these paintings and illustrations
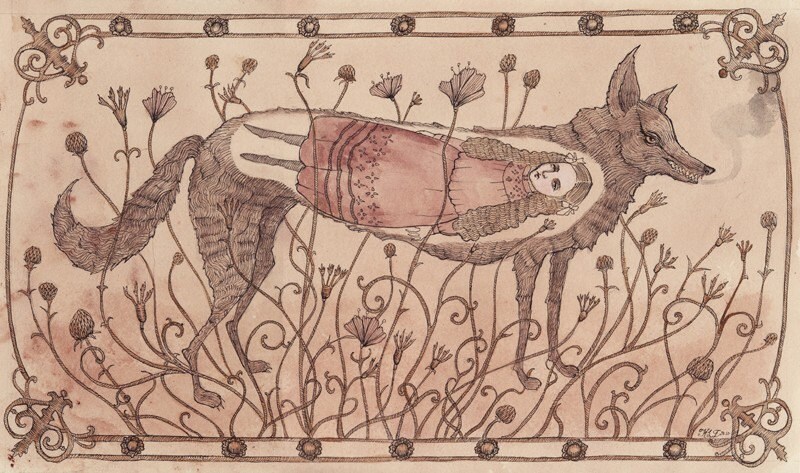
check it out if you have a chance
Tuesday, November 2, 2010
We are pleased to announce...
Registration is NOW OPEN
 |
| photo courtesy Kecia Deveney |
OUR INSTRUCTOR LINE-UP IS FABULOUS
& THE WORKSHOPS ARE JUST WONDERFUL!


JULY 29 - AUG 1, 2011
All the details, workshop info and registration
can be found on our website - CLICK HERE
 |
| photo courtesy Kecia Deveney |
We hope to see you at the festivities!
Monday, November 1, 2010
carrots!
In late Winter, when cabin-fever has reached its peak, I pour over seed catalogs, gardening magazines and I make seed tape. Seed tape is ultra-easy and really great for your teeny-tiny seeds - such as carrots.
EASY SEED TAPE:
You will need a roll of toilet paper, flour, water, a popsicle stick or small brush, wax paper, a Sharpie & small ruler, tweezers and your seeds. Spread wax paper on a large flat surface. Roll out toilet paper into strips (later you can tear/cut your strips to shorter lengths if preferred). Read your seed packet to see what your seed spacing when planted should be...measure & mark with dots on your toilet paper. Mix flour and water in a small bowl to a medium-thick oatmeal consistency. This is your "glue". Dab or brush a tiny amount onto your dot-marks. With your fingers or tweezers, carefully place your seeds on your glue dots. I usually put a few seeds on each as I want to ensure germination and I can always thin later in the garden once they have sprouted. Let dry thoroughly and store in a dry, dark place (I usually place in a shoebox in a closet).
So back to carrots - this year I planted hundreds because we love them fresh, frozen, in soups & stews and they are ultra-easy to grow.

I chose to split my harvest into two rounds a few weeks apart and two days ago (just in the nick of time before the snowfall), I pulled the last of my carrots. Harvesting root vegetables is very satisfying for me - something about carefully loosening the soil and pulling treasures from the earth is a simple delight. There are always little surprises as well - some carrots hit a rock while growing and adapt by growing around the object into funny odd shapes. They certainly are not the perfect gems you see at market but are still edible and make me smile.


Remove your carrots from the boiling water immediately
and place in icewater bath
this cools them down quickly so that they do not continue to cook
let the carrots cool down completely

place cool carrots into a freezer bag or container
make sure to remove all excess air before sealing
place in your freezer & enjoy
EASY SEED TAPE:
You will need a roll of toilet paper, flour, water, a popsicle stick or small brush, wax paper, a Sharpie & small ruler, tweezers and your seeds. Spread wax paper on a large flat surface. Roll out toilet paper into strips (later you can tear/cut your strips to shorter lengths if preferred). Read your seed packet to see what your seed spacing when planted should be...measure & mark with dots on your toilet paper. Mix flour and water in a small bowl to a medium-thick oatmeal consistency. This is your "glue". Dab or brush a tiny amount onto your dot-marks. With your fingers or tweezers, carefully place your seeds on your glue dots. I usually put a few seeds on each as I want to ensure germination and I can always thin later in the garden once they have sprouted. Let dry thoroughly and store in a dry, dark place (I usually place in a shoebox in a closet).
So back to carrots - this year I planted hundreds because we love them fresh, frozen, in soups & stews and they are ultra-easy to grow.
I chose to split my harvest into two rounds a few weeks apart and two days ago (just in the nick of time before the snowfall), I pulled the last of my carrots. Harvesting root vegetables is very satisfying for me - something about carefully loosening the soil and pulling treasures from the earth is a simple delight. There are always little surprises as well - some carrots hit a rock while growing and adapt by growing around the object into funny odd shapes. They certainly are not the perfect gems you see at market but are still edible and make me smile.
As I mentioned, we use carrots in all sorts of ways - some are washed, cut, peeled and eaten fresh as a snack or in salads. Carrots like all root vegetables store well but I find its super easy and fast to prep & freeze them for later use.
FREEZING CARROTS
Brush the majority of soil from your carrots and then wash really well
Chop your carrots - chop the greens end off and make sure
to throw out any "bad looking areas"


my pup LOVES carrots
she gets very excited when the chopping begins
Blanch your carrots
This is a very important step when freezing vegetables
Take a large pot, bring water to boiling,
dump in carrots and blanch for 2 minutes
Note: Blanching time varies by vegetable and their chopped size
and place in icewater bath
this cools them down quickly so that they do not continue to cook
let the carrots cool down completely
place cool carrots into a freezer bag or container
make sure to remove all excess air before sealing
place in your freezer & enjoy
Subscribe to:
Posts (Atom)